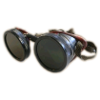
How-To: Costume Goggles
Posted by on October 30th,2006So, I thought it may prove useful to those who require a pair of those most essential of Steampunk accessories – Brass Goggles – to have a quick How-To on how to very quickly cobble together a pair in an great hurry. These will not survive a trip to the Moon, or the Centre of the Earth, but they may survive an evenings entertainment at a party.
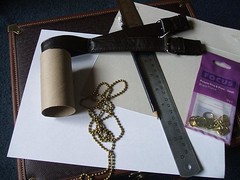
Supplies:
- 2 toilet roll tubes. These will form your eye cups – same size please.
- Thin cardboard – side of a cereal box, for example.
- 1 sheet of paper – for drawing your template.
- 2 inches of plug-chain – see image.
- 2 picture hoops.
- A strap – you may use black elastic like I eventually did.
- Thin clear plastic – CD cover, electrical item packaging, etc
- 4 brads. (The little pin things with the split legs.)
- Masking tape.
- Pencil, ruler, craft knife, cutting surface, common sense, etc.
 Template Creation:
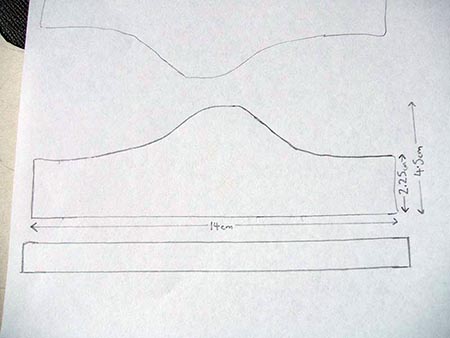 The above image shows the template you must draw on your piece of paper. The exact shape isn’t cruicial, just follow the general shape – bell graph shape. The sizes are on the image.Cutting Out the Eye Cups:Once you have your template, cut it out and temporarily tape it on the end of your toilet roll tube. Draw around the edge on to the toilet roll – you should see the shape of the eye cup now. If the template is too big or small for your toilet roll tube, just extend or contract the flat sections at the edges.
After that, cut around the line (carefully) with a sharp craft knife on a suitable cutting surface. There! Your first eye cup. Do this again on the other end of your toilet roll to get your second eye cup. (Unless of course you’re making a monoggle.)
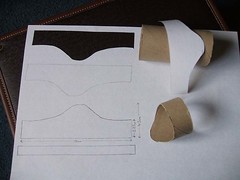 Creating the Goggle End Pieces, Part 1:
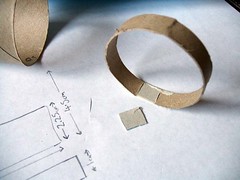
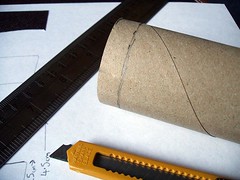 Taking your other toilet roll tube in hand, measure and draw around the edge approximately half an inch to make a ring.Carefully cut along that line to create a ring of tube.You’ll want two of those.Goggle End Pieces, Part 2:So once you have the two rings you’ve ever so carefully cut out – slice them open with the knife.Take a small piece of the thin cardboard you have (cereal box, or equiv) and cut a small rectangular piece out to fit in as an extender for the cardboard ring. Tape it in place, with some masking tape.
Check the fit on the ends of the eye cups – it should slide on to the eye cup easily, but not be too loose.
 Goggle End Pieces, Part 3:
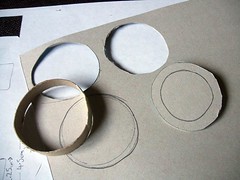 Using your new extended cardboard tube section as a template, carefully draw around it on the flat piece of cardboard you have.Draw another circle just a 1/3 of an inch or so inside that circle – cut both circles out so you have a thin flat circle of card.You again, want to have two of these.Assemble the End Caps:With the extended ring of cardboard, and the newly cut out circle (and copious amounts of masking tape) attach the two cardboard components together to end up with the assembly similar to the one on the right.
Depending on how careful you’ve been, this will either be simple, or it may be as tricky as herding cats. But you will prevail in the end. Masking tape is your friend.
Once you’ve done two of these, you should be able to see the goggle shape really appearing now. Check to make sure they still fit.
 Sealing Edges (Optional):
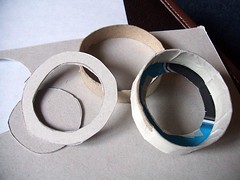
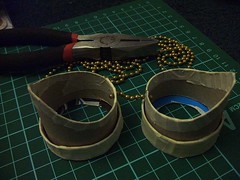
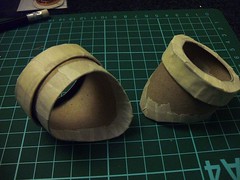 To tidy my goggles up, I used a lot of masking tape to seal off the edges – this is optional.Note that once you paint the goggles, the masked sections and the unmasked sections will take paint differently, giving two different surfaces. You may want to tape up everything for consistancy.Adding the Bridge Chain:To add the chain across the bridge of the nose, gingerly mark out symmetrical positions on the eye cups, just above the thinnest area of it. Easiest way to do this is hold it against your eye and mark the cardboard with a blunt pencil. Be careful, and don’t poke your eye out, please.
Once you’ve got the position (on both eye cups), cut carefully down from the face-side edge into the eyecup by about half an inch.
Feed in one end of the plug chain, using the end bobble as a ‘stop’. It should be quite stiff to do so – this is good. Test the length that you want by feeding in different amounts of bobbles to the other eye cup – I found that six bobbles was good for me. Once you’ve found your number, snip off the excess with piers and tape up the slits.
 Paint:
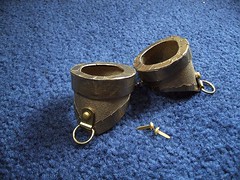
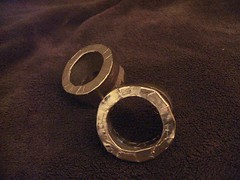 All set? Then paint away – I chose metallic gold spray paint for my goggles, because it can do a very good brass impersonation. Remember to spray the eye cups and the end caps seperately, and do let them dry before putting them on your face.As funny as it would look to have gold circles around your eyes.Don’t worry about painting the chain – depending on what colour you started with, it might even make the chain look better (if you don’t want to paint the chain, just cover with loose masking tape, and remove afterwards).Adding the Strap Hoops:Using one brad each (the split legged pin things) attach the painting hoop to the long sides of the eye cups.
This is the point when if you want to add any more decorative embellishments you can quite easily do so.
I left mine plain, just to show the basics, but no doubt I’ll add some cogs, pretend rivets and wires soon. Maybe you could add some plastic gemstones, ribbons, or even if you’re technically inclined, a couple of LED’s.
 Adding the Strap, the Lenses and Finished:
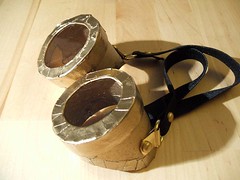 Two things to do to finish – cut the correct length of elastic (or other strap) to fit your head almost-loosely, and to use the end caps as templates to cut out two circles of thin plastic (CD case or plastic packaging) as your lenses.I used the lid from a Christmas card box for my lenses, but you could go daft with plastic filters, coloured plastic, chocolate wrappers or even permanent markers.Finally, I attached the elastic with another two brads. Note that if you do this, if you stick the sharp legs through, make sure to bend them back through the fold so that they don’t scratch the side of your face.And you’re finished. One pair of very quick, very simple goggles made – no fancy materials required and they should top a hastily created costume nicely. Again, if you have more time and/or skill, you could decorate these to better fit your persona – be that with fake patina, pewter instead of brass, encrusted gems, fake rivets, or even little makers plaques on the sides. If you make some – do let me know, I’d love to see how you get on! It’s always about the goggles.